Showing posts with label Painting. Show all posts

Thursday, November 1, 2012

"Dia de Los Muertos" Sugar Skull Face Paint Tutorial

One of the many things I've learned from my mom -- always make your own Halloween costume and never spend a lot of money doing it. It's like a personal challenge every year to come up with a super sweet costume idea using things around the house and/or spending as little as possible. 

For example, my owl costume from last year or my paper wig.

And of course my man gets just as into it as I do. He's got just as many creative juices, flowing through his veins, as I do. Have I mentioned we're a match made in heaven? 

This year is another story. We've been so busy and exhausted lately. I mean, where did October go? We really hadn't planned anything for Halloween. Then Ryan came home from work the day before Halloween with some face paint and some rhinestones. "I'm going to make you a pretty little sugar skull," he said. 

I've had this fabulous photo pinned of a beautiful girl with her face painted like a sugar skull from el Dia de Los Muertos (Day of the Dead). Ryan used her as the inspiration for what you see below. It's creepy, it's sparkly, it's awesome.

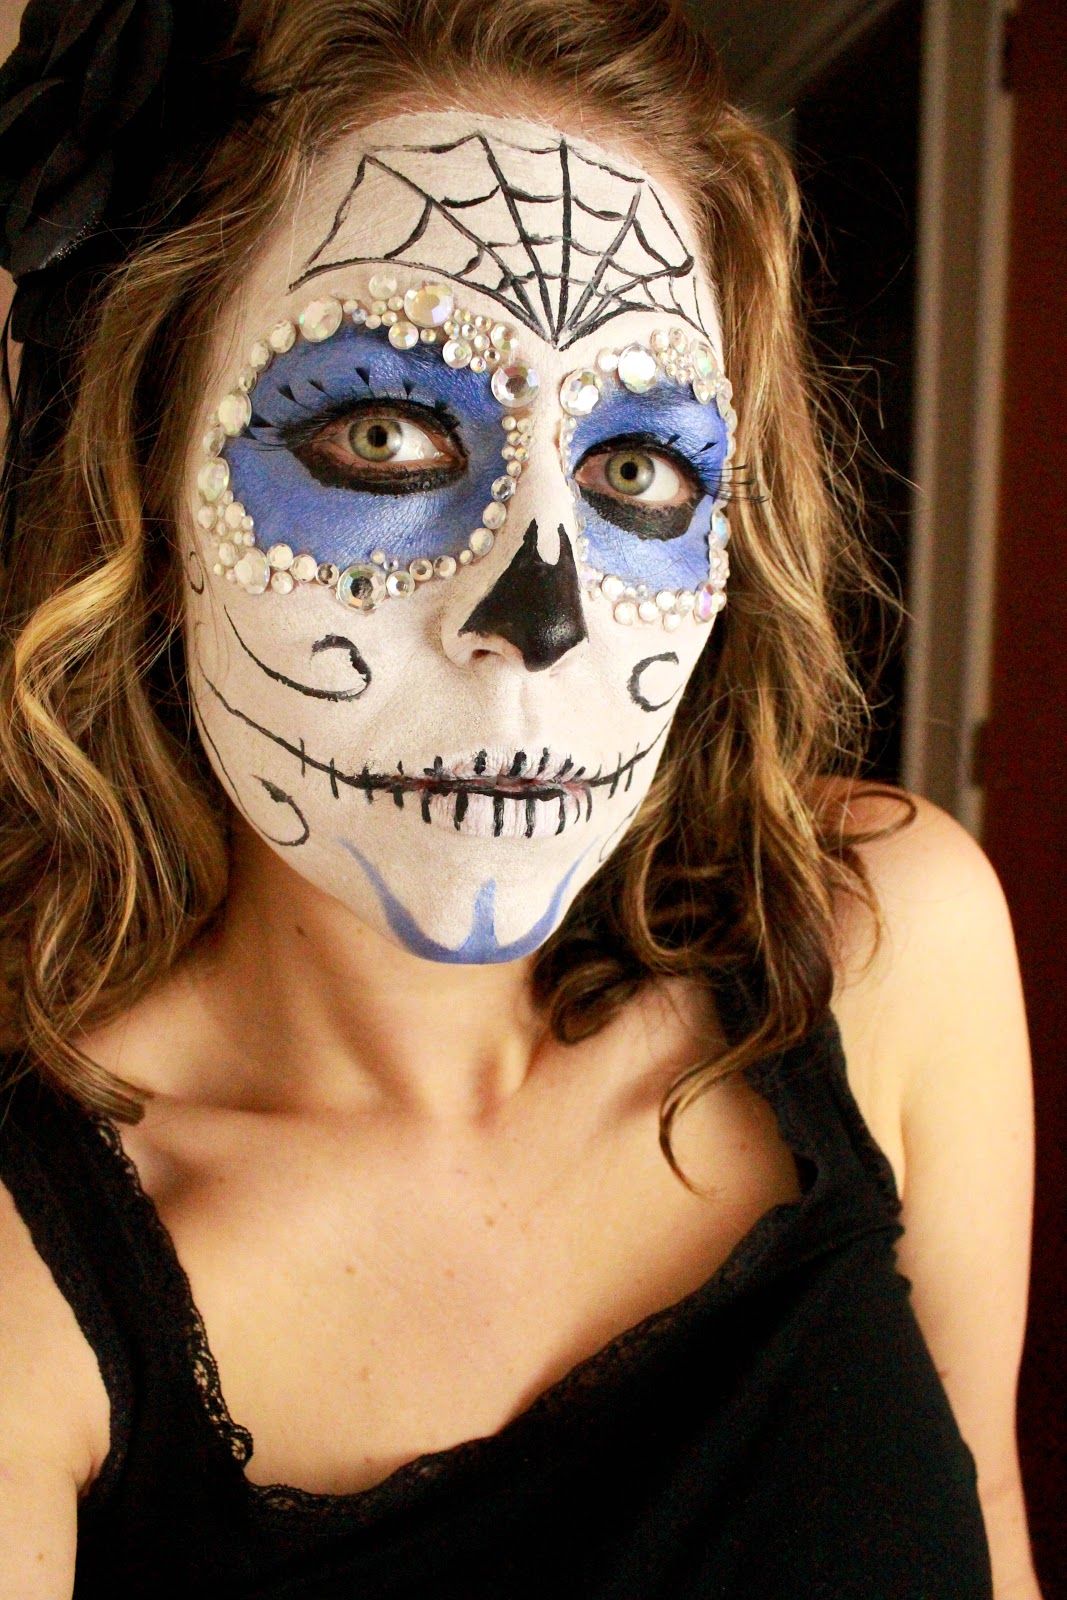
We got up earlier than usual so that he could paint and bedazzle my face before work. Unfortunately, not early enough to have time to take photos of each step as I had hoped. So I apologize for the lack of photos during the process, but I'll try to explain the steps as best I can.

Sunday, October 16, 2011

Robot Gifts


I found a lot of robot gifts for Baby Riot that also doubled as decorations for the shower. I want to share them with you, as well as great gifts from other people at the shower, in case any of you know a little boy who loves robots.

Forget the teddy bear, this stuffed robot is the cutest thing ever, right? Riot's gonna love him!


This book is ADORABLE. There are gears that spin, which will be great when the baby gets a little older.


Thursday, October 13, 2011

Robot Baby Shower Favors

We go through a lot of bottles of Starbucks Mocha Frappaccino at our house. We buy them by the case at Costco. So I was so excited when I came across this great idea using the bottles over at Kerry's Crafts. I began hoarding the bottles in our mud room, knowing that I would find a use for them eventually.


TA DA! I decided to finally put the bottles to use in creating the favors for my sister's vintage robot-themed baby shower. The first step was getting the sticky labels off. After hand-washing the first ten bottles and slowly peeling off the labels, not without much frustration, it dawned on me to put them in the dishwasher. Not only does the dishwasher get them spic and span, but right after the drying heat cycle the labels peel off so easily. Just make sure you pull them out and take the labels off while the bottles are still warm.

After the lids were clean, I primed them with a primer spray paint. Trust me you're gonna wanna prime the lids, because the Starbucks logo is very dark and will show through. Then I followed up with some sparkly silver spray paint.


Once you have clean bottles and painted lids, it's time to cut the paper. I used a vintage looking paper pad by My Mind's Eye called Complete Boy. I cut the paper into strips 2 1/2" wide and 9 1/2 " long. 


Put a strip of double-stick tape on each edge and a little strip in the center. Wrap the paper around the bottle, secure the edge and voilà...


I punched out circles and robots then ran them through my sticker maker so that they would stick really well to the bottles.


The finishing touch was a little bit of sparkle. I ran Stickles, which I love, around the circles.


Wednesday, October 12, 2011

Makeover Results: Dresser and Hutch

I finished this months ago and am just now posting. Ryan and I got this piece and at a local antique store (to see what it looked like before click here). I fell in love with it, but we had no place to put it. Then it hit me, I still didn't have a desk for my craft room. Why not use it as a workspace/storage? Brilliant! I absolutely love the way it turned out.


If you look at the before pictures, you can see that it was a lavender color, yuck. I've just never been a fan of pastels, not even at Easter. So I decided to go with a neutral color, a cream. As I said earlier, I had the brilliant idea to sand and paint in 100 degree weather. I just think of it as dual-purpose: refinishing a piece of furniture and sweating out all of the toxins in my body.

I didn't do any heavy sanding or use a primer before painting. I just wiped off all the dust, then got to work painting every little nook and cranny. Which, as you can see, there are a lot! That's part of what I loved about this piece: all of the curves and grooves. Avoiding paint drips from all of these curves and grooves, however, was a major pain in my derrière. After two coats, I didn't like the sheen of the paint, too shiny. So I did a third coat with a flat paint in a slightly darker color, the first being brighter than I thought.

The last step : sanding the edges to give it that antique/shabby chic look. I thought that being outside, in the open air, and sanding by hand (not a big electric sander) wouldn't warrant goggles or a mask. Wrong. A word to the wise, wear goggles at least. Even if you don't see much dust coming off. Your eyes will thank you later.

You want to sand every edge that would be exposed over time to rubbing. The beauty of it is, it doesn't have to be perfect. You want it to look worn and old. All those imperfections give it character.


The original piece was meant to be a vanity/dresser, so there was a mirror on the left. The mirror was broken, which was partly why we got such a good deal. We took the mirror out and Ryan cut a piece of steel to fit the opening. He spray-painted it with a metallic silver and then sealed it. Now, I have a fantastic magnetic board.


I like to use antique teacup saucers as little catch-alls. I also filled the thrift store frames (from my sister's baby shower) with some of my favorite photos. The ribbon holder below was 50% off at Michael's recently, which made me a happy girl. I was finally able to wrangle up all of my ribbon.

Thursday, August 18, 2011

Makeover: Lavender Dresser and Hutch

Ryan and I went down to an antique center in Chico called Eighth and Main (it's huge, you should check it out if you're local). I came across this piece and fell in love with it. A few other people were eyeballing it, so I knew I had to jump on it ! I was not so keen on the lavender color, but I was willing to take on the challenge.


We talked the seller down to a pretty good price, since the mirror was broken.


LinkWithin

Related Posts Plugin for WordPress, Blogger...