Wednesday, November 2, 2011

Harry Potter and a DIY Paper Wig

Now I am one of a rare and dying breed...those that have never read any of the Harry Potter books or seen any of the movies. Gasp, I know. And it just so happens that Ryan and I were invited to a Harry Potter-themed Halloween party. What's a girl (with no Harry Potter knowledge) to do? Google it.

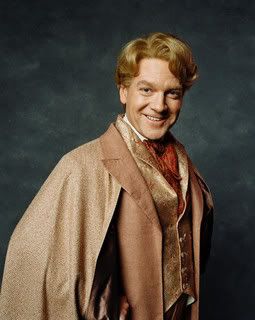
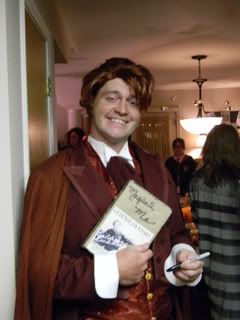
We decided on Gilderoy Lockhart for Ryan. One rented 3-piece suit and a carefully styled wig later...
            
When it came to me the first suggestion was Madame Maxime. She's a French teacher...I'm a French teacher, she has a brunette bob...I have a brunette bob. My research revealed that she is mighty tall. Ryan's suggestion: "Just walk around on stilts." Um...I was definitely not committed enough to the character to risk a broken ankle.

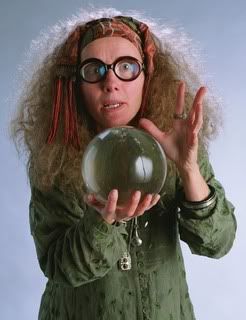
Then we came across Sybill Trelawney, Professor of Divination. Big coke bottle glasses, hippy attire, and long wild hair. Now that's a costume I could put together.
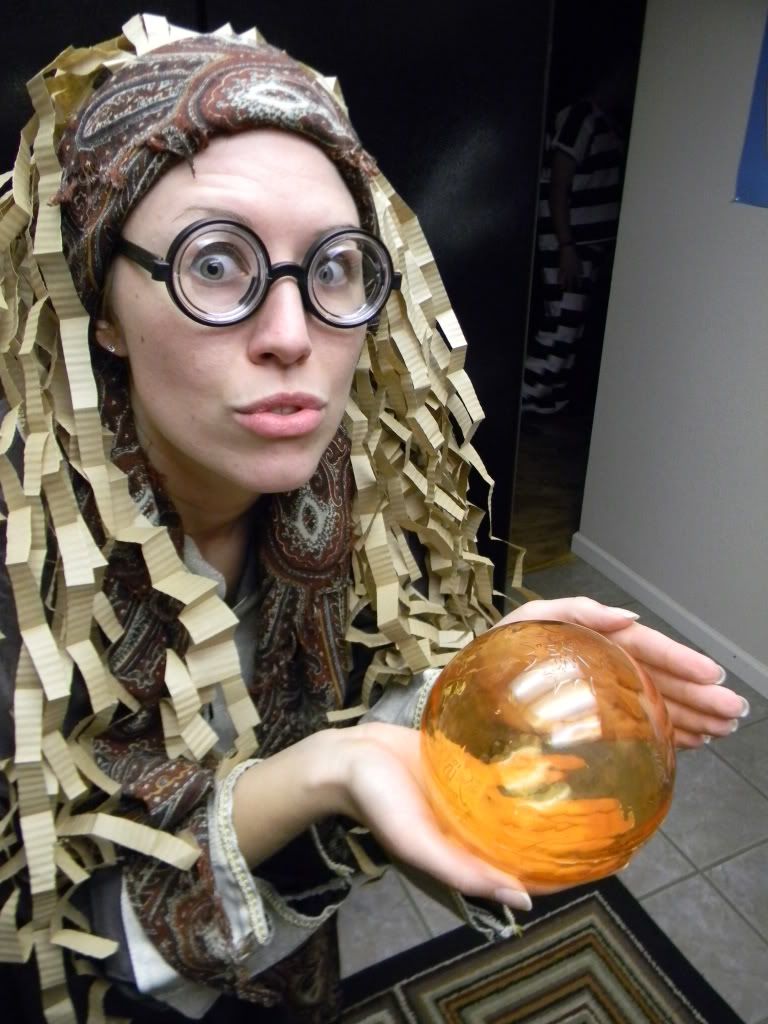
            
Call me weird, but I refused to wear a wig from the costume rental store. The wigs I looked at had bobby pins and leaves still in them from the last customer. Scenarios ran through my mind of how someone ends up with leaves in their wig. No thank you. 

The used wig was out. Store-bought wigs were pricey. I had made a paper wig in the past while working at a summer camp for kids. Trelawney's crazy hair would be easy to make out of paper. It's really simple, let me show you...

All you need is a hot glue gun, scissors, paper of your choice, and a beanie. The first time I made a paper wig, I didn't use a beanie. I simply made a skull-cap by holding butcher paper over my head and wrapping masking tape around, then trimming it.

Since Trelawney's hair is sort of a brushed out perm, I wanted to give the paper texture. This paper crimper did just that.

After running sections of paper through the crimper, I cut them into strips. Next, I folded the strips accordion style.

Sunday, October 23, 2011

DIY Lady Owl Costume

I was determined to make my own costume this year...on the cheap. The materials for this little owl costume ended up costing less than twenty dollars! I'm so happy with how it turned out and it was so easy. Anybody could do it and it would be great adapted for kids or even babies (how cute would a Onesie with these little fabric feathers be?).

I was inspired by this really cute homemade owl costume by Chelsea over at Seablanket. She used a pillowcase, but my...girly figure (to put it nicely) wouldn't exactly fit in the pillowcase I tried. Easy solution: clearance dress from Ross. I was originally looking for a mod 60's boxier dress shape, but no luck. I did however find this sweater dress for $7.99. Here's the before :


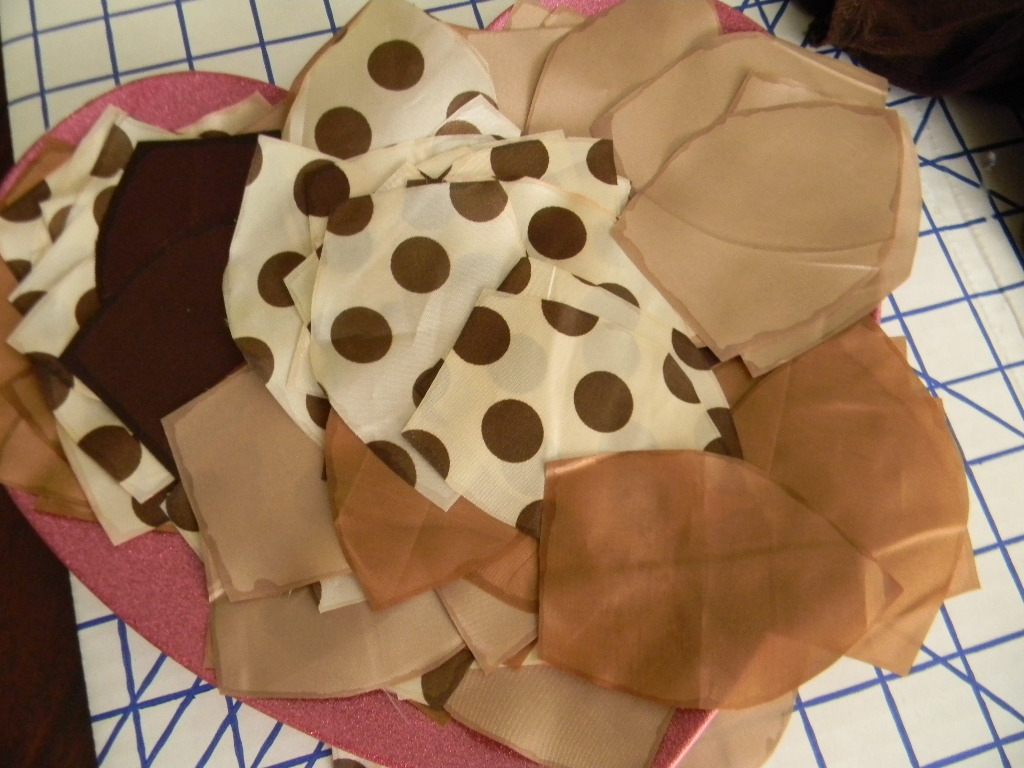
I went to Joann's, 20% off coupon in hand, to gather fabrics for my costume. The fabric I decided on is actually lining. It's lightweight, cheap, and it has a pretty sheen. I originally bought the zebra fabric thinking it might look feathery  once cut in the right shape. But in the end, I decided against the zebra print.

I cut out large petal shapes from each fabric color. The only problem with the fabric I chose was that it frayed easily. So I ran a little Fray Check along the edges and problem solved. When it came to putting the petals on the dress, my little hot glue gun worked like a charm. Quick and easy.

Monday, October 17, 2011

Mouth-watering Jalapeno Popper Dip

It's cheesy, it's gooey, it's tangy, it's spicy. Everybody loves this dip! And I mean everyone. Even my friends who don't like spicy food, overcome their aversion to peppers, in order to eat it. It's love at first taste for most. I can't even count how many times I've been asked for the recipe.

This dip incorporates all that is delightful about a jalapeno popper : the creaminess of the cheese, the toasted breadcrumbs, and the heat from the peppers. You can easily adjust the spiciness to your liking. No matter what, this dip aims to please. It's a real guilty pleasure. 

With football season rolling around, this is a handy little recipe, easy to whip up, in a hungry-group-of-football-fans kind of emergency. 


I always serve this dip with toasted baguette slices. The crunch and flavor of the fresh bread is unbeatable. In a pinch, tortilla or pita chips would suffice.

Jalapeno Popper Dip

I always double this recipe and use a 9"x13" Pyrex. Reason: it goes fast and you don't want to deal with hungry friends when the popper dip runs out. Not pretty. And if by some miracle there are leftovers, this dip tastes even better the second time around.
  • 2 (8 oz.) packages of Neufchâtel cheese (labeled as: 1/3 less fat cream cheese), softened
  • 1 cup sour cream
  • 1 (4 oz.) can diced green chilies
  • 1 (4 oz.) can diced jalapenos
  • 1 1/2 cups shredded Parmesan cheese
  • breadcrumbs (I like to use the garlic and herb flavored crumbs)
  • freshly ground black pepper
  • baguette
  • olive oil
Preheat the oven to 350 degrees. Using a hand mixer, beat together cream cheese and sour cream. Stir in the diced green chilies and jalapenos. Mix in 3/4 cup Parmesan cheese and add freshly ground black pepper, to taste. 

Sunday, October 16, 2011

Pumpkin Muffins with Streusel Topping

I am loving my first fall in Paradise. Back home by now, it would be rainy and gloomy. Here the sun is still shining, but now there is a slight breeze. The air smells different, good different, and the leaves are beautiful shades of gold and orange. A girl can definitely get used to this. 

Whenever fall rolls around, I think of this recipe. Ok...ok, who am I kidding, I make these muffins all year-round. But they seem especially fitting when summer turns to fall. As these muffins bake, they fill your entire house with the delicious aroma of cinnamon and pumpkin. Every time I make these, I think about how incredible it would be to awake to the smell of them. So if you happen to have family or friends visiting... that you want to spoil...you should sneak to the kitchen (before they wake up) and get these little guys in the oven. You'd be the best hostess (or host) ever!


Pumpkin Muffins with Streusel Topping and Cream Cheese Drizzle 

Adapted from Stephanie's Kitchen

For the muffins:
3 cups All-purpose flour
1 1/2 Tbsp. baking powder
1/2 tsp. salt
1/2 tsp. pumpkin pie spice
1 tsp. cinnamon
1/2 cup butter, melted
1/2 cup sugar
1/2 cup brown sugar
2 eggs
1 tsp. vanilla extract
1/4 cup milk
1/4 cup heavy cream
1 cup canned pumpkin

Robot Gifts


I found a lot of robot gifts for Baby Riot that also doubled as decorations for the shower. I want to share them with you, as well as great gifts from other people at the shower, in case any of you know a little boy who loves robots.

Forget the teddy bear, this stuffed robot is the cutest thing ever, right? Riot's gonna love him!


This book is ADORABLE. There are gears that spin, which will be great when the baby gets a little older.


Robot Baby Shower Decor


I wanted to share some of the details from the robot baby shower. 


This is another thrift store frame that I spray painted. It's an easy way to a give a pop of color, as well as label different areas of the shower. There were a lot of people that didn't know each other, so I thought that name tags would be nice. They were especially nice in keeping track of points during the games.

Thursday, October 13, 2011

Robot Baby Shower Favors

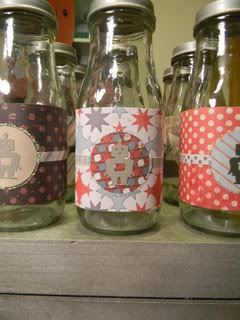
We go through a lot of bottles of Starbucks Mocha Frappaccino at our house. We buy them by the case at Costco. So I was so excited when I came across this great idea using the bottles over at Kerry's Crafts. I began hoarding the bottles in our mud room, knowing that I would find a use for them eventually.


TA DA! I decided to finally put the bottles to use in creating the favors for my sister's vintage robot-themed baby shower. The first step was getting the sticky labels off. After hand-washing the first ten bottles and slowly peeling off the labels, not without much frustration, it dawned on me to put them in the dishwasher. Not only does the dishwasher get them spic and span, but right after the drying heat cycle the labels peel off so easily. Just make sure you pull them out and take the labels off while the bottles are still warm.

After the lids were clean, I primed them with a primer spray paint. Trust me you're gonna wanna prime the lids, because the Starbucks logo is very dark and will show through. Then I followed up with some sparkly silver spray paint.


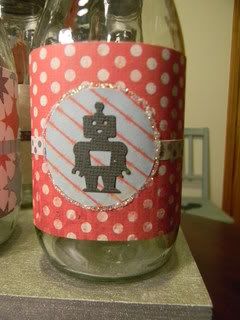
Once you have clean bottles and painted lids, it's time to cut the paper. I used a vintage looking paper pad by My Mind's Eye called Complete Boy. I cut the paper into strips 2 1/2" wide and 9 1/2 " long. 


Put a strip of double-stick tape on each edge and a little strip in the center. Wrap the paper around the bottle, secure the edge and voilà...


I punched out circles and robots then ran them through my sticker maker so that they would stick really well to the bottles.


The finishing touch was a little bit of sparkle. I ran Stickles, which I love, around the circles.


LinkWithin

Related Posts Plugin for WordPress, Blogger...