


I found the tutorial for these flowers over at Folding Trees.

winker n. 1. one who or that which winks 2. Colloq. an eyelash or an eye
(who refers to an eyelash as a winker? "Ouch, I have a winker in my eye!")
fop n. a man who is excessively concerned about his manners and appearance
(Was this the 50's version of a man who's "metro" ?)
foppery n. the manners, actions, dress of a fop
......................................................................................................................................

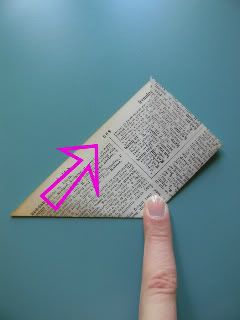
Start with a book page cut down to a 5" square.
 |  |
Bring two corners together to form a triangle. Bring the bottom right corner up to the top corner.
 | 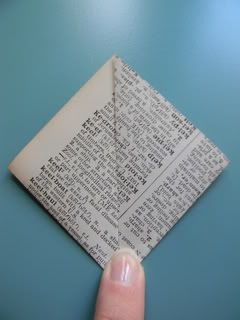 |
Now bring the left corner up to the top corner, which will leave you with a small diamond.
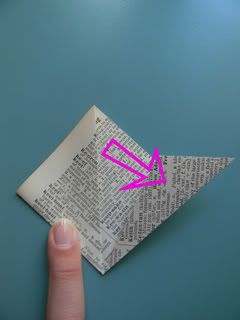 |  |
Now turn down the right flap and fold it in line with the edge of the diamond. Do the same with the left side.
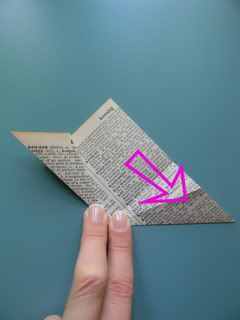 |  |
Pull out the right fold, then open it up and fold it down upon itself to form a kite shape.
 | 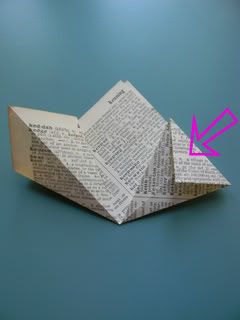 |
Form a kite on the other side as well. Fold down the pointed tip in line with the original triangle.
 | 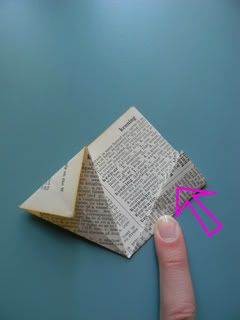 |
Fold down the other tip. Now fold the right triangle in half on the crease that already exists. Repeat on the other side.

Use a gluestick to glue the two small triangles together.

You've now finished one petal! Now do it four more times and you'll have yourself a pretty little flower.

Once I've made 5 "petals," I use double stick tape to put them together. I tried a gluestick the first time, but double stick tape holds up much better (especially because the petals pull a bit to reach each other).
I wanted to put these on my Christmas tree so I had to jazz them up a bit. I took small strips of teal cardstock and cut slits. Then I wrapped the paper strip around a wire ornament hanger (you could also use a paperclip straightened out), secured it with a small piece of tape, then pulled it through the center of the flower.


I finished by running some glitter glue along the center of the flower. It's difficult to see in the photo, but they definitely sparkle in person. I love 'em!


Pin It
I wish we'd had these in our dorm rooom...I'm so glad I found your blog! Now I'll follow you and copy your ideas!
ReplyDelete-Ann
Ann? My long lost college roommate? I don't know that we could've fit a Christmas tree in our ridiculously small dorm room. Or did we have a mini tree on top of our mini fridge? I can't remember. Let me know how it turns out if you try 'em. :)
ReplyDeleteThese are gorgeous! How have I missed them until now?I'm going to make them, and they'll stay up year round:) Just lovely!
ReplyDeleteAnd who says "winker" instead of eyelash? As of right now, I do! Merry Christmas:))
Thanks to The WHOot! for featuring these lovely flowers! I have several old books that I'll use to make these and other projects. So easy.
ReplyDeletelove this great flower. I have to make it. Love this blog!!!!!!!!!!
ReplyDelete