Friday, January 27, 2012

Root Beer for Grown Ups


About a month ago, Ryan and I were walking through the liquor store, when I spotted this old-timey bottle. I was intrigued. Upon closer inspection, I saw that it was a root beer liqueur, named after an old man: the Blackmaker. The bottle's tag tells the tale of a grumpy gentleman, who spent his time in the mountains, collecting herbs and making concoctions. He sold his mixtures to the town store, including this liqueur. I can't resist booze with a kooky story. 


The old man's ingredients for root beer extract included wintergreen, nutmeg, cinnamon, cloves, ginger, sweet birch, and star anise. I can just see him wandering the woods with his pack, collecting all sorts of herbs, grumbling to himself. Maybe some lass broke his heart. Maybe the Blackmaker never existed. One thing I do know - this bottle is more than a cool label. It's contents are mighty tasty.


Friday, January 20, 2012

Parmesan Coated Goat Cheese with Basil Oil


Oh goat cheese, how I love thee. I wish others shared my enthusiasm. I'm not sure what it is that makes folks shy away from goat cheese. Maybe it's the word goat that's not so appetizing. Personally, I fell in love with goat cheese while I was studying abroad in France five years ago. At parties, they would serve small bites of goat cheese with all sorts of fresh herbs sprinkled on top. To my amazement, I found similar bite size goat cheese with herbs at Costco. They are delicious! The perfect snack or appetizer.

Now for this little beauty...


I came across this recipe and couldn't wait to try it. Ryan liked it, but me, I was giddy with how delicious it was. The tanginess of the goat cheese, the bite of the raw garlic, the crispness of the fresh basil, all piled on top of freshly baked buttery bread...it's almost too much to handle. So good! And the presentation, look at that beautiful green color. If you love goat cheese or you're feeling brave, you've gotta try this recipe. You won't be sorry. Although, I can't guarantee that you won't ruin your dinner by finishing off this "appetizer" in one sitting, it's that good.


I did a few things differently from Annie's version. Annie's version calls for plain goat cheese, but I used an herb-flavored goat cheese from Trader Joe's. I also used 5 oz. of cheese, instead of 4 oz. She recommends running the oil through a sieve, but I didn't have one and I liked the basil leaves left in the oil. 

Start by blending parmesan cheese and panko in a food processor to form a crumb coating.

Then mix together goat cheese, garlic, kosher salt, and black pepper.

Form the cheese mixture into a ball, then roll around to coat with panko mixture. Chill in the fridge.

Blanch basil leaves, then mince in food processor with garlic. Add the olive oil. 


Pour the basil olive oil onto a plate. Place goat cheese in the center and garnish with basil leaves. 

Thursday, January 19, 2012

Butte 52: Week 2 - Murals in Downtown Chico

If you walk around downtown, it's plain to see that Chico embraces it's artists. Buildings (both old and new), newspaper stands, benches are all blanketed with artwork. Around every corner, there are works of art both, beautiful and bizarre, vintage and modern, colorful and curious.

The man with the awesome feather in his hat? That's William Everone, an artist, who has done several murals downtown. He was commissioned to do two sepia-toned murals of a trolley (one coming towards you, and the other moving away) in the City Plaza. 

He is incorporating minerals from around the world in the mural. While chatting with us, he was grinding crystals from Mount Shasta into this violet paint. He has also included sand from Afghanistan into the paint for the mural.


Another mural of Everone's. He wanted us to know that it was part of a collection of art, throughout the country, that spells out "LOVE" on a map. It's called the 23rd Hour Wakeup Call Love Tour.

Here are just a few of the other murals you can find downtown:

The Beatles walking along Main Street. 


The Brooklyn Bridge on the Boys and Girls Club.

Friday, January 13, 2012

Goals for 2012

I usually don't make HUGE New Year's resolutions. I tend to make a long list of mini goals to achieve and better habits to adopt throughout the year. This year I made my list as usual. Then I came across this manifesto idea by Aileen at Creating Clever. Inspired by the manifesto, I made my own (of sorts) ...


Sorry about the somewhat blurry screenshot view. As soon as my printer decides to be my friend again, I  plan on printing this little beauty and framing it around my house (bathroom, craftroom, fridge, nightstand) to remind me to get my butt in gear.

fearless in the kitchen: I find myself thinking "that seems like a lot of work" or "I'm no chef, how do I do that?" No more of that. I'm gonna try new techniques and new ingredients. I will make more things from scratch. I will not be intimidated.

Sunday, January 8, 2012

Butte 52: Week One - The Lookout


I've lived in Paradise for a few months now and I think it's time, for my new home and I, to get to know each other a little better. So I've decided to start a project, more of a mission. For each week in 2012, I'm going to photograph something from Paradise, Chico, or some other place in Butte County (in case you were wondering, Butte County is in the Sacramento Valley in Northern California). There are a lot of things that make this area special: beautiful parks, one of a kind eateries, local events, historical landmarks, unique shops, and incredible agriculture. I'm going to explore them all while learning to use my new camera.


I saw this under the big sign. I love that this club exists in my town. Maybe they can give me some pointers.

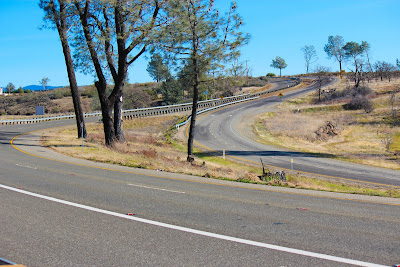
Paradise sits up on a hill, above the town of Chico. To get from Chico to Paradise you have to take the Skyway, a road that winds and turns as you make the slow climb up the hill.


Whenever I drive up and down the Skyway, I pass this lookout point. Well I finally stopped to look and snap some photos.


The sign calls it the "Little Grand Canyon" of Butte Creek.


There are a lot of interesting looking trees reaching out into the sky.


Saturday, January 7, 2012

S'mores Cupcakes Please...


I always opt to make cupcakes for birthdays and gatherings. They're just so much better than cake. There's no cutting involved, no forks, no plates and let's face it they're so cute! We had some family and friends over for Ryan's birthday yesterday. For dessert we had S'mores Cupcakes.

Now, I'm not the biggest fan of s'mores. They're just so sweet and whenever I'm in a situation where there are s'mores, like camping, there never seems to be an ice cold glass of milk around. Which prompted Ryan to ask : "Do you even like s'mores?...Then why are you making s'mores cupcakes?" Good question. Not really sure. They seemed like they would be a crowd-pleaser. And they were! Check it out:

 Ryan liked 'em

Lexi liked 'em

Rilyn liked 'em

Even I liked them! The graham cracker layer at the bottom gives a nice crunchy texture to contrast the super moist cake. And Ryan concocted a cream cheese marshmallow frosting. True teamwork. I baked the cupcakes, he made the frosting. He frosted the cupcakes, I topped them off with a piece of chocolate.

For the recipe read on...

Thursday, January 5, 2012

Happy Birthday Handsome

Today is Ryan's 28th birthday. It's my day to spoil him. I got my happy butt up at 4:30 this morning to make him waffles with homemade vanilla syrup. He claimed it was the best waffle he'd ever tasted. He sure is easy to please, seeing as they were Bisquick waffles.

He also woke up to this little Post-it banner on his bathroom mirror. This is a simple and quick way to surprise someone for a special day or just because. Who doesn't like waking up to a surprise note? Just cut post-its into triangles, spell out your message, and stick 'em. No hole punch, no string, no fuss.

My man...so excited to get a jerky maker. "Food dehydrator" to be exact. Although he mainly wanted it to make jerky, he was intrigued to read that he can make his own fruit roll ups as well. Again, easy to please. Don't worry I got him other stuff.

Why do I keep him around? Well, he's beyond handy, incredibly brilliant, an amazing artist, and let's face it devilishly good looking. He never sighs when I take on another DIY project, instead he asks if he can help. He doesn't complain if I have nothing planned for dinner, instead he offers to exercise his culinary genius to whip something up. And no matter how much crap he catches from his friends, he has no problem walking around a craft fair or taking an art class with me. As if that isn't enough, he let me take over, and I mean completely overtake, our second bedroom with craft "supplies" (more like tons of crap I'm hoarding in the hopes that I will someday use it to make something pretty)! One day he will have his mancave and it will be epic.

So here's to you John William Ryan Turner (you can thank family tradition for all those names), my partner in crime, I love ya and appreciate all that you do. Bon anniversaire!


Sunday, January 1, 2012

DIY Doll Beds and Tiny Quilts

Ryan's nieces love their American Girl dolls, so I wanted to make them something for Christmas that their dolls could use. Their dolls already have millions of outfits. Why not furniture? I came across lots of ideas including this picnic table, which I'm also dying to make. Ultimately, I decided on these farmhouse beds from Ana White

For our first wood project together, I would say that Ryan and I did a pretty rockin' job. And we did it for only $20 each! I'll break down the cost at the end of the post. I also made my first quilt ever. Actually, two. They may have been mini, but that's two mini victories for me.


One niece likes pink and the other likes purple. I spent a long time in the fabric store choosing fabrics to go together. So long in fact, that some woman asked me for help, because she thought I worked there.


 The beds fit 18" dolls.

The reverse side of the quilts are awfully cute too.

We used step by step instructions for the farmhouse bed from Ana White's blog. If you've never been to her site, you have got to check it out! She is incredibly talented, a lumber goddess really. The best part of it all is that she makes it easy for you to build beautiful things too. Go to her site, you'll see.

A couple of things we did differently from Ana White's instructions. We only used four panels in the headboard and foot board (with five slots it was wider than we needed). Also, to save money, we used thick cardboard (instead of plywood) to support the mattress.

The beds coming together.

My man hard at work. We realized that we desperately need a larger work space if we're going to do more projects like this in the future. Somehow he made it work with just the top of his tool chest and two not-so-sturdy sawhorses.

Once Ryan finished putting the beds together, I used wood filler on the screw holes then sanded the whole bed down. I then primed and painted the beds with some paint I had leftover from the antique dresser and hutch.

Now for the bedding. Remember I'm no expert. But I'll try to explain how I made the doll quilts.

LinkWithin

Related Posts Plugin for WordPress, Blogger...