Thursday, December 8, 2011

5 Days of Felt : Felt Gift Bows

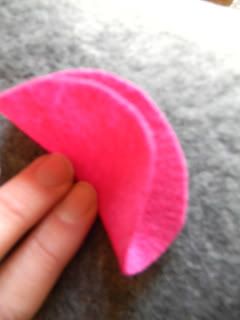
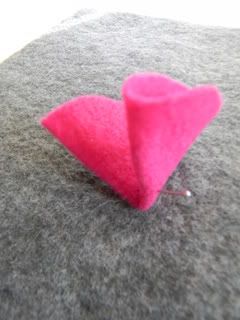
It's Day Two of 5 Days of Felt and today I want to share how to make reusable felt bows. The beauty of these little guys is that they can't get crushed in the car, on the way to family gatherings, like paper bows do. And they cost around 50 cents each! These were inspired by How About Orange's magazine bow tutorial.


What you'll need :
   - 9"x12" sheets of felt
   - ruler
   - scissors or rotary cutter
   - hot glue gun and glue

Sunday, December 4, 2011

5 Days of Felt : Ruffly Rosette Wreath

Ever since I made the felt dress up dolls, I have been so excited about felt! I hadn't used felt since I was a kid, but lately I've been searching for more adult ways to use it. With all of these great ideas, I've decided to do 5 Days of Felt. I can't promise that they will be five consecutive days, but there will be five days with five fun ways to use felt.

To kick off 5 Days of Felt, I'm sharing this ruffly rosette wreath that I made for my sister's house. I came across the tutorial for the rosette wreath at Domestifluff awhile ago and had been wanting to try it. I also wanted to decorate my sister's house for Christmas since my little nephew had just been born and she was a little busy with the whole newborn thing.

Please forgive the car seat backdrop. My car was the only place with good light. This is the wreath in route to my sister's house. You might be thinking pink?, that's not a traditional Christmas color. But my sister = not so traditional, just one of the many reasons I love her!


Now let me show you how to make it. You'll need: 
  - 12" styrofoam wreath
  - about 2 yards felt (maybe a little less)
  - a box of 200 straight pins
  - 3" circle template
  - pen

The first step is to cut a 3" circle template from some cardstock. Then get to tracing! I started with the 9"x12" sheets of felt. I could fit 10 circles on one sheet. I ended up running out of sheets of felt so I headed back to the store and then bought a yard of felt in the same color. That's why I'm not sure exactly how much felt you need total. I do however know that I cut out 168 circles. That's right, I counted. I only   covered the front and sides of the wreath so that it would lay flush with the wall. If you want to cover the back of the wreath as well, you will definitely need more circles.


Once you have the circles cut out (that is the most time consuming part), it's time to start covering your wreath with ruffles. Take each circle, fold it in half and then half again. Push a straight pin through the bottom corner.


Tuesday, November 29, 2011

The Little Man has Arrived!


Sorry that I've been M.I.A. for the last few weeks, but my little nephew finally came! He is cuter than I could have ever imagined. 7 lbs. and 13 oz. of pure awesome. I'm gonna miss him when I leave.


I've spent the last two weeks dipping into crafty projects, treasure hunting at local vintage and antique shops, and spending lots of time with the people that I love. My time here  is coming to a close and my little wiener dog and I will soon be hitting the road, headed home to Paradise. Here's hoping there's no snow in the mountains or I foresee a hot mess involving me and some snow chains. As soon as I get back, I have a lot of Christmas projects to share with you all.


Welcome to the world beautiful baby Riot!

Thursday, November 17, 2011

An Easy Way to Give Thanks


385 miles later and I am sitting in a little motel circa 1952 in Eugene, OR. I'm on my way back home to keep my very pregnant sister company until my little nephew arrives. I decided to stop halfway into the drive, because it is a loooong trip to do all at once...alone...especially if you have a tendency to get sleepy driving...even after three mochas. So here I am. I just got my laptop back after having the hard drive crash and losing all of my docs and photos. Sad times. Now I finally have a chance to share this little project I threw together a few days ago.

The Thanksgiving decorations are looking a little slim at my house this year. So I was super excited when I came across this freebie over at Sugartotdesigns that can be put together so easily. I think it took me about 10 minutes!

Remember this thrift store frame from the baby shower? This was a great new use for it.

You'll need:
- a large frame
- free printable from Sugartotdesigns
- cardstock in colors and patterns that suit your fancy
- scissors
- gluestick
- dry-erase marker


 How funny is this extreme gluestick? I like feeling extreme while crafting.


Print off the freebie in the color you like (Sugartotdesigns offers four colors to choose from). Back it with a solid-colored cardstock. Then arrange patterned papers behind and close frame. So easy!


 I hung the frame in our dining room. 


Simply use a dry-erase marker to fill in what you are grateful for. The beauty is that you can hang it up at the beginning of the month and then fill in something new every day counting down to Thanksgiving. It's a nice reminder each day of the blessings in your life. Here are a few of mine:


Monday, November 7, 2011

DIY Felt Dress Up Dolls

Ryan's twin nieces were turning six and I wanted to make them something special. I came across this idea for felt dress up dolls at Smile and Wave, which also led me to these extremely cute felt dresses by Olivia Mew. I absolutely love the way the dolls turned out! 


I couldn't wait to start cutting out the miniature fashionistas. I headed to Joann's and grabbed a bunch of felt. I hadn't done any crafts with felt in a loooong time. I was surprised to find they even had animal print felt. 


Of course, I had to throw in a little felt wiener dog. We had fun coming up with the accessories. Ryan made the cupcakes and cut the parrots freehand! He never ceases to amaze me.


Rachel was sweet enough to share a template for the dolls in her post. Use this as a jumping off point and then channel your inner fashion designer and run with it.


A hunt through my craft room turned up flower-shaped brads, mini pearls, ribbon, buttons, and lots of little bling. So I went to town adding the finishing touches to the clothes.

Meow! My attempt above at felt cat-eye glasses. Maybe if I had done them in black, they would have looked more like cat-eye glasses and less like a superhero mask.

I would have loved to make even more clothes and accessories. Ryan had to pull me away when I was still cutting out little hairdos and handbags ten minutes before the party was supposed to start. He reminded me that I could make them more wardrobe pieces as a Christmas gift (which is the perfect idea since I'm sure a few pieces will have been sucked up into the vacuum by then). 


Now I know that it's lame to give a dual gift to twins. But with the sandwich board they can each have their own side to dress up dolls. I personalized them with their names. Plus they have twice the wardrobe options so they can swap clothes with each other, doll clothes that is (one of the twins is much taller than the other).

You can choose a different color for the board felt. But I ended up following Rachel's lead and choosing a light gray. No other color worked as well. It's neutral and it allows the brightly colored clothes to pop.

Here's how to make the felt board :

Sunday, November 6, 2011

Hot Spinach Dip

This is an easy dip to throw together if you have friends coming over (especially if you're like me and always have a huge bag of spinach in your fridge). What I love about it...no mayonnaise! I'm certainly not mayo's biggest fan. And it always seems like dips are packed full of mayo. Not this one. It's got so much flavor, from the sweetness of the sautéed onions to the tanginess of the cream cheese, and at the end of each bite there's a hint of heat from the paprika. I set this dip out for folks to snack on while I was making white chicken chili and I couldn't stop eating it! Dice some onions...bite of spinach dip...cook some chicken...bite of spinach dip...add green chilies to the pot...bite of spinach dip. I just couldn't help myself. Test your willpower and try it for yourself!


Hot Spinach Dip


  • olive oil
  • 1 cup onion, diced
  • 2 cloves of garlic, minced
  • 1 lb. fresh spinach, rinsed and roughly chopped
  • 1/2 cup milk
  • 8 oz. cream cheese
  • 3 dashes Worcestershire sauce
  • 3 dashes hot sauce
  • 1 cup shredded mozzarella cheese, divided
  • 1/2 tsp. paprika
  • kosher salt and freshly ground black pepper
Preheat the oven to 425 degrees. 


Drizzle a little olive oil in a pot, then heat to medium heat. Add spinach and cook until completely wilted. Drain the liquid from the spinach using a colander, press to ensure all excess liquid is drained.

Saturday, November 5, 2011

Flavorful White Chicken Chili

This is my all time favorite chili recipe! It's rustic and hearty, warm and comforting. It's pure perfection on a chilly fall day. My friend Katie made this chili for me years ago and I fell in love instantly. It's her mother's recipe. Thanks Mrs. Lamont!

Yesterday, it was finally chilly enough here in Paradise to start a fire in our wood stove. That's when I knew that it was time for white chicken chili! We had friends coming over so I doubled the recipe. This chili recipe is not as thick as others, so you wanna make sure that you have some fresh warm bread to soak up all of the deliciousness.

Try this dutch oven bread, it's so easy to make at home. You could make fresh baked cheddar-jalapeno bread, or pepperjack, or garlic, so many options to accompany this amazing chicken chili.

White Chicken Chili

Ingredients
  • 1 lb. boneless chicken breast, cubed
  • 1 medium onion, chopped
  • 1 1/2 tsp. garlic powder (I also add fresh minced garlic, if I have any laying around)
  • 1 Tbsp. olive oil
  • 1 (4 oz.) can diced green chilies
  • 2 Tbsp. diced jalapenos (optional, if you don't like it hot)
  • 1 (14.5 oz.) can chicken broth
  • 2 (15 oz.) cans Great Northern Beans, rinsed and drained
  • 1 tsp. salt
  • 1 tsp. cumin
  • 1 tsp. oregano
  • freshly ground black pepper, to taste
  • 1 cup sour cream
  • 1/2 cup whipping cream

LinkWithin

Related Posts Plugin for WordPress, Blogger...